cze 132022
 

After a long time it’s time for a big upgrade of my computer hardware orchestra. Here it is! The bigger and better Floppotron 3.0. 512 floppy disk drives, 4 scanners and 16 hard disk drives.

My noise-making contraption grew a little bit since last update. It has its own „studio” space and became a relatively complex device. There is a ton of cables, a lot of custom electronic circuits, but the whole power is in the firmware which has been rewritten from scratch. In this article I’ll try to explain the principle of operation, how it’s built, how the whole system works, what’s still missing, provide some more technical details for nerds and answer the most commonly asked questions.

So how does it all work?

To avoid scaring the non-technical readers away at the beginning, I’ll start with the basic operating principles and explain where these sounds come from. Every mechanical device with electric motor or any other moving parts makes noise as a side effect. Sometimes that noise can be controlled. and turned into music – which usually involves some level of abuse. All of the devices present in the „orchestra” contain either stepper motors or moving heads (in case of hard drives), which are driven by custom electronic circuits – controllers. Those controllers are connected in a network and can be commanded from the computer to make a specific device (e.g. scanner #2) emit a specific sound (e.g. constant 440hz tone which corresponds to A4 note in music) at a specific point in time. A sequence of those noises and tones makes music – just like with the real instruments. Sounds simple? In principle, yes, but it gets complicated in a larger scale.

How it’s done?

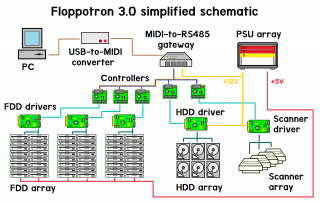
The machine evolved into a relatively large system with multiple custom circuit boards and 3D-printed parts. While making the new Floppotron, one of the main priorities (if not the main) was finishing it in reasonable time. It’s still a hobby project made after hours and not something commercial or mass produced, so you will find some nice solution as well as some janky, quick-and-dirty ones – and that’s the beauty of hobby projects. Let’s get a little more technical. To explain how the system works, I’ll go through the overview first and then will get into details of each individual block. Here’s a simplified schematic od the machine.

To make the old computer hardware play, we need a set of electronic controllers mentioned before but also a proper music (musical sequence) to play. A melody is encoded as a sequence od MIDI events, the same format as all digital synthesizers use. MIDI does not carry any actual audio data, but just short events, like pressing a piano key or twisting a control knob – you can think of it as a digital form of sheet music. Those events are send from the computer to the gateway using USB to MIDI adapter. The gateway is a custom nRF52 microcontroller based device which sits between the PC with MIDI adapter and the network of „instrument” controllers. It receives MIDI data and converts that data to RS-485-based internal protocol which can encapsulate MIDI and some extra stuff. The gateway, protocol and reasoning is described in further section. Those messages are picked by controllers which will turn the digital information into a sound by driving the electric motors or moving the hard disk heads. The controller consists of a common MCU board with Nordic nRF52832 chip and a driver boards specific to the „instrument”, like floppy drive string, flatbed scanner or a hard drive. If you’re wandering why there is a Bluetooth-enabled chip – I’ll explain it too, but let’s talk about how the sound is created first.

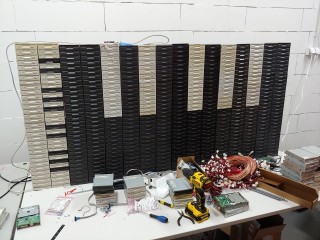
Floppy disk drive wall

A floppy disk contains a magnetic disk inside which is read and written by the drive (FDD). The data is stored by the magnetic head being moved over the spinning disk surface which incorporates two motors. One in the middle of the drive which spins the disk around and a second one driving the linear mechanism which slides the head across the disk radius. It’s the latter, stepper motor which makes that specific FDD seek sound. The head assembly is moved back and forth in small steps and each of those steps make a click. If the step rate is high enough, it is perceived as a constant tone with its pitch depending on movement speed.
   
The controller software takes care of driving multiple disk drives at once to step its heads with requested frequency. There is also one more thing which makes it sound good and more natural – it’s the sound envelope simulation. The drives are grouped in columns by the software and the whole column can only play one tone at a time, but with varying number of drives playing. By changing the number of active drives I can make the tone volume change over time and mimic piano keystrokes or plucking guitar string which volume decays exponentially. The envelope can also be used to get other nice sounding effects, like vibration (sinusoidal envelope), etc.

Driving a single FDD is easy, as it provides a simple digital interface to control the head position on its 34-pin connector. To move the head, only 3 signals are required – EN (enable), DIR (direction) and STEP. The head step is performed on falling edge of STEP signal in a direction selected by DIR pin state, provided that EN is active (logical „0”), which also lights the LED on the front of a drive. Connecting and driving a larger amount of drives makes it a little more complicated.
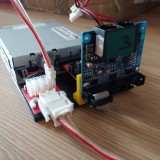
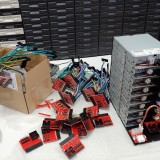
 
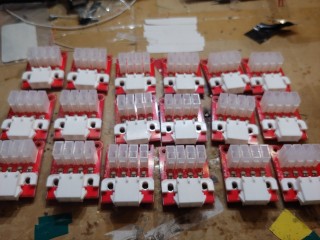
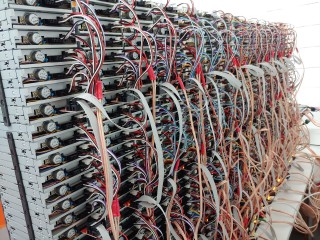
To connect that many drives, I made a set of daisy-chained adapter boards containing buffers and shift registers (driven with SPI) providing more outputs. Generating the signal sequences for that many drives is tricky, but I was able to get a pretty god performance with some programming tricks and by using PPI (a special peripheral present in Nordic chips) to offload a signifiant part of the signal generation from the CPU. In current configuration, one controller drives up to 192 drives, so I’m using 3 controllers to drive 512 FDDs. More drives per controller is still possible with some further optimization (to keep the satisfying timing resolution), but it’s not really needed at this point.

     
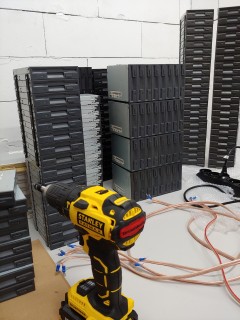
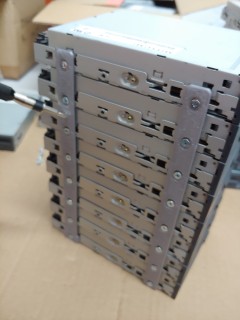
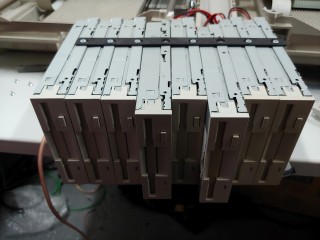
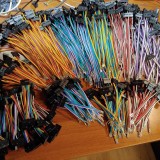
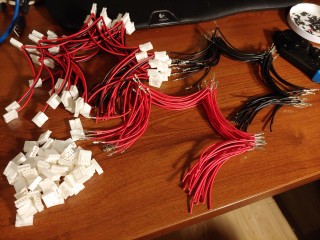
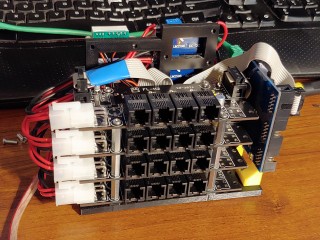
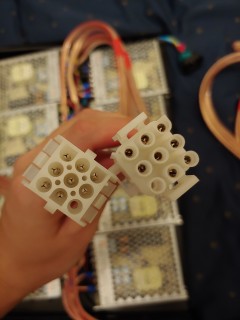
The FDD wall is made of 8-drive blocks tied together with 3D-printed rails. Every block has one adapter (assembled in local SMT manufacturing facility) plugged into the first drive. The remaining seven drives are connected to the adapter outputs with hand-made cables terminated with Dupont connectors. The cabling was the most tedious part. I was planning to order such cables in a local factory, but due to lead time exceeding a couple of month I decided to go a quick-and-dirty way. I have ordered a bag of so-called rainbow cables in hobby shop, removed the 1×1 plastic connectors with a knife ((512 – 64) drives * 4 wires * 2 sides!) and put the larger 2-row connectors. I was also initially experimenting with a multiple IDC 2,54 connectors on a single ribbon cable (to avoid cable mess like in previous FLoppotron) – it went pretty good, but required assembly of tinny PCB adapter for every drive which would also increase time and costs. I went with the solution which maybe does not look that cool, but was faster, hassle-less, and cheaper. I couldn’t find any pre-made cables for FDD power, so I had to make those cables and crimp the connectors by hand. Every stack of drives has a 3D printed base which holds the controllers and power boards with resettable fuse. There is one dedicated resettable fuse with indicator LED per each 8-drive block, so failing (shorting) drive with shutdown the block until the short is removed. That protects the cables and makes the replacements of (up to 30-year old) failed drives easier – which, by the way, do fail occasionally. Plastic base with thin plastic rails is not the sturdiest construction, but that will do for now.


Flatbed scanners

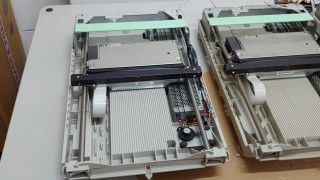
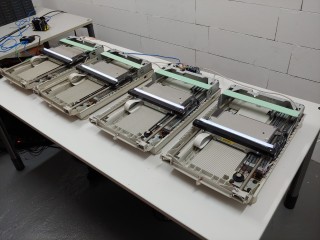
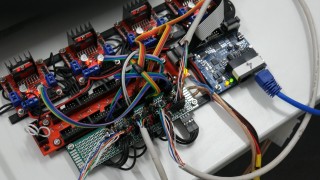
The floppy disk drives do a good job playing low pitch tones, but does not handle high notes well. It’s a task for flatbed scanner motors. They have larger motors and can play higher pitch sounds. To drive the scanner motors, I have build a prototype driver using one of my previous prototype output boards combined with off-the-shelf H-bridge modules mounted on a 3D-printed frame. There are four old HP scanners, almost identical as the larger on in Floppotron 2.0 – it took me quite a bit to hunt them on eBay and local Polish advertisement sites. At the moment, it works in the same way as in the previous Floppotron – the controller moves the scanner head assembly using stepper motor with varying speed and alternating direction to avoid bumping against the chassis. It still does not have endstop switches and cannot automatically position itself in the center on power-up – that’s something I want to implement in the next hardware update.
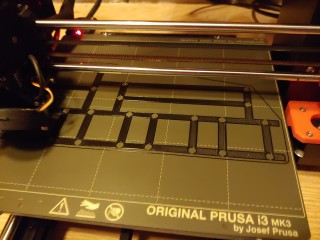
  
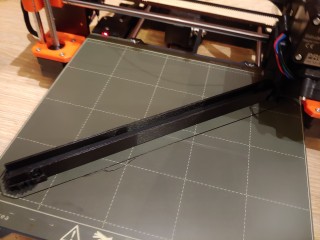
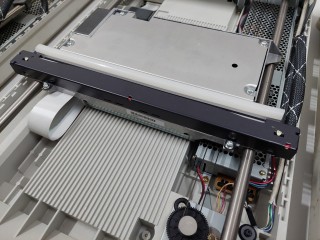
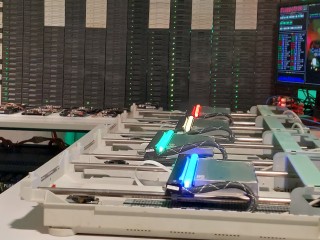
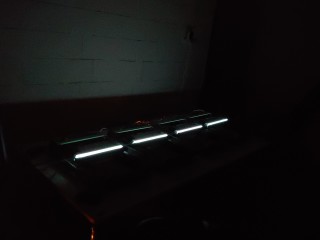
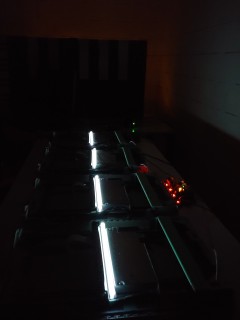
However, there are two new features. The first one is the nice looking, neon-like silicon RGB LED strip mounted on each scanner head. In addition to aesthetics, it helps in identifying which device is actually playing which section by pulsing with the notes. The strips are press-fitted into a 3D-printed rails replacing a part of metal housing and scanner mirror assembly. The second new feature comes with the entirely new software and MIDI support – pitch and modulation effects has been improved. Now the scanners can make even more weird sounds.


Hard disk drives

The clicking sound of the hard disks is produced by energizing the coil in the magnetic head assembly. That head is effectively a speaker – but unlike in case of speakers, the element being moved is an arm with magnetic read/write head instead of a speaker cone. In normal operation, the head is moved back and forth over disk platters within the safe operating region. When pushed too far, it will hit the boundary and make a loud click – something you really don’t want to happen with a live hard drive storing your data.

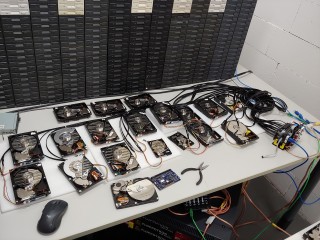
Some time ago I bought a couple of small lots of random old hard drives on eBay-like services. Every drive model has slightly different mechanics, has a different metal casing and therefore make a different sound when abused. To make the set of hard disks sound a little more like a drumset, I had test each drive and sort them by sound they make. Some drives make a bassy „clack”, some of them make higher „bang” and some of them sound like a bell. Each one of 16 drives in current setup has been assigned to a closest General MIDI drum sound it can mimic, e.g. kick drum, snare or closed hi-hat.
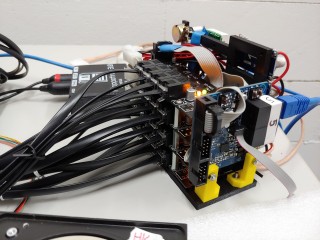
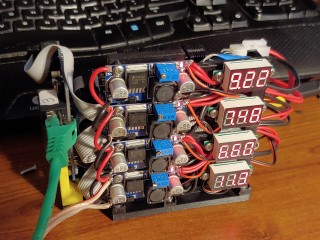
    
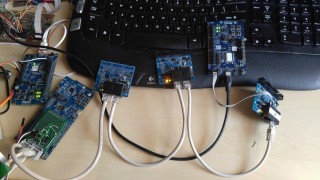
Unlike the scanner controller, the hard disk controller is more complete. The controller is a bundle of boards tied with wires and 3D-printed prototype frames. There is a single common controller board with dedicated software (as in all other controllers), and a chain of custom H-driver boards in pair with off-the-shelf voltage regulator board (with a cheap clone of LM2576/LM2596/etc) – one pair per every group of 4 drives.

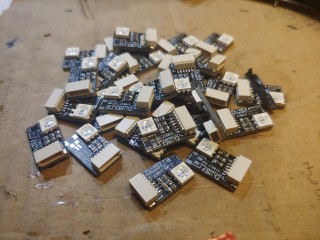
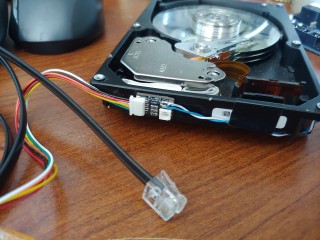
To connect HDD heads I have used modular 6p6c (RJ12) connectors (which are very common and easy to crimp) and a flat 6-conductor phone cable I had laying around. It’s not the best way to carry power due to its thin wires and high resistance, but it’s way thinner by common UTP cable and running 16 of those on a table look way more clean. Aesthetics are also important in this kind of project, so if it works – it’s good enough. Every hard disk has been equipped with a tiny hand-soldered board containing RGB LED and a cable connector. As with scanners, the flashing LEDs help identify which drives are playing.
   

Controllers, gateway and communication

The instruments are exposed to the PC as a MIDI device using USB-MIDI adapter connected the gateway – another custom device with 3D-printed case. I wanted to connect all the instrument controllers in star topology (instead of a daisy-chain as it could be done with MIDI), so I built a converter box with MIDI interface on one side and RS485 network on the other side. With that architecture, the orchestra can be up-scaled easily.
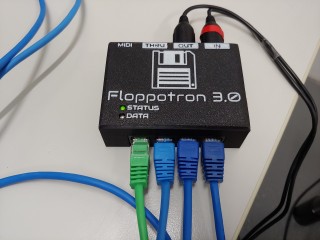
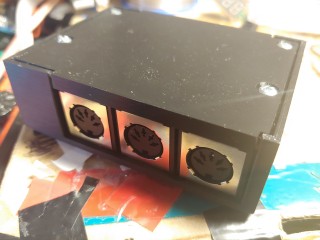
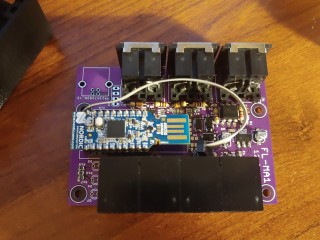
As a connectors I have used modular RJ45s which provide data and +12V power to the controllers. RS485 lines are shared, so controllers have two RJ45s and can be daisy-chained to shorten the cable run. While a passive MIDI-RS485 converter could technically work (as MIDI is a serial interface with a current loop), I made it more complex to get features like checksums, etc. The converter is based on nRF52840 module and a custom baseboard with MIDI/RS485 transcievers and connectors. The software converts MIDI serial data to internal RS485 protocol at higher baudrate (a similar protocol to Modbus). It also has some more features like scanning the internal network and even software updates of controllers behind the gateway over MIDI. It can also be expanded in future. NRF52840 has USB device hardware, so USB-MIDI could optionally be implemented directly in the gateway to bypass low MIDI baudrate limitation (31250) in case of adding multiple new devices into the network. DMX lighting over MIDI is also a possible option.

    
The controllers include a common MCU boards and instrument-specific driver circuits. For a quick and easy development, I have picked a platform I know well and have worked with for a couple of years on daily basis – nRF52 (Nordic Semiconductor) ARM Cortex-M microcontrollers. It’s a Bluetooth LE-enabled MCU family (which I’m not using in this project) with a couple of other very useful features. The main two worth pointing out are fully remappable pins and PPI peripheral which allows to trigger actions by events generated by other peripherals without CPU interaction.

Great power comes with great energy bill!

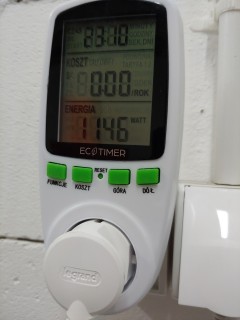
With increased size, power demand has also increased significantly. Two PC ATX power supplies are not going to cut it anymore. While scanner moors and hard disk heads don’t need a lot of power, 512 Floppy disk make the numbers go high. One drive consume a relatively large amount of power when making noise – up to 2-2,5W (0,4-0,5A at 5V) depending on drive model and frequency. One stack of 32 drives can draw up to around 16A of current when all drives are active. In a typical use case the average current is lower, usually 20-30% depending on music being played. The whole stack is (usually) active for only a short period of time as the controller varies the number of playing drives to alter the sound volume in time. Adding the numbers – 16 stacks may theoretically consume 1,28kW in peak (I have measured at most around ~1,15kW with all 512 drives buzzing).
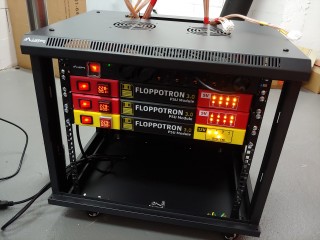
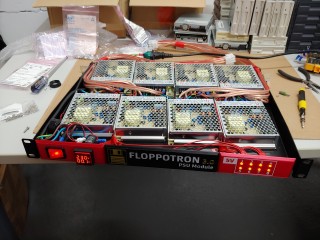
     
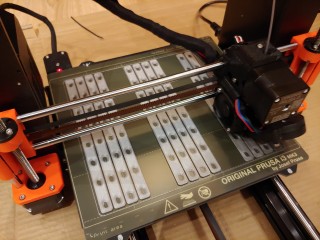
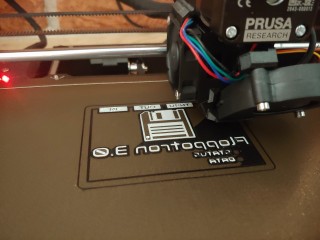
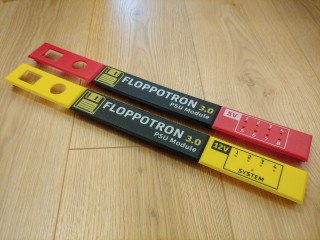
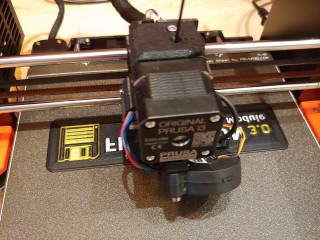
To power the drives, I have used an array of 16 modular 5V/18A power supplies – 18A of continuous current provides a large buffer, even if I wanted to go 100% power for some reason. Every module has built-in over-temperature and short protection. The smaller modules have some advantages over larger PSU with higher specs (>200W) which fit this project very well. They are cheap ($18-$20 each), they have no fans, and the case is low-profile so the modules can be placed on 1U rack shelf. I have considered mounting those modules behind every FDD stack to avoid thick cables for up to 16A, but have eventually decided to install them on perforated 1U shelves inside of 19″ rack cabinet. That turned out to be a good decision, because there is no high voltage cables outside the rack, switching mode supplies can become noisy under load (especially when there are 16 modules) and the biggest advantage – case was built without putting much effort using off-the-shelf parts. There are also some extra aesthetic elements – 3D-printed front panels for PSU modules. I have designed the 3-part panels in Fusion 360 and printed them with Prusa MK3s 3D-printer on a textured base plate. If you’re curious about the labels – I made them by printing the texts on the bottom layer and switching filaments. In general, 3D-printer did a nice job in this project.

        
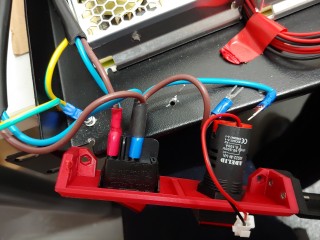
One suspicious thing in the above pictures that might have caught your attention is the cable color. Yes, that’s a 4mm² speaker cable. I know, I know, that definitely does not meet the safety standards because of the insulation thermal parameters… but it’s not an industrial machinery. …and the cable was pretty cheap. At least it’s a pure copper cable, not one of that coated aluminum crap. The cables are terminated with fat 6,35mm connectors which can handle the maximum load. The whole cabinet is protected with softstart module. That prevents the PSU module array with high input capacitance from tripping the breaker on powerup.

How the music is made?

The device is MIDI-compatible, which means I can use any music composer software which can output MIDI or save MIDI files. Note sequences are encoded as MIDI events, placed on up to 16 tracks. Each track can be assigned to a specific section in the orchestra by changing its program (instrument) parameter. The specific floppy drive stacks play bass tracks, guitar or piano tracks and some of the drum sounds. Hard disks are assigned to drums and scanners play lead tracks. Instruments (or program numbers) can be selected from the list in any MIDI editing software.
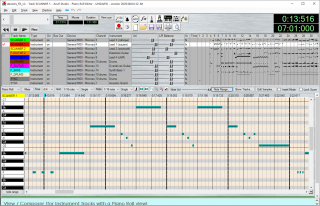
To create an arrangement, I usually start with already existing MIDI file. If I cannot find one, I have to make it from scratch – from hearing or using sheet music when available. Even if there is an existing MIDI for a specific song, re-arranging it for The Floppotron is still a time consuming process. Every „instrument” in the setup have its limits and the track must fit the note range it can play. Making a track sound good on the stacks of FDDs or a scanner usually involves a lot of tweaking. I also spend some time to add the fine details, like slides (portamento) or vibratos to mimic the quirks in vocal or guitar parts of original songs – these has to be recreated by ear. Making one arrangement for 3.0 usually takes me 3-4 evenings, which is a little longer than for the older Floppotron 2.0.

Other software

Along with the controller firmware, there is also some software on the PC side. Controllers are configured using dedicated application written in Python. It allows me to set the parameters like connected instrument type or MIDI mapping table. It can also update the firmware in every controller over MIDI port.
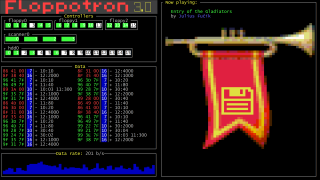
There is also one more application used for visuals only – a colorful retro-looking text terminal showing the machine status. It’s also a Python application using Urwid TUI library (running under Cygwin/XTerm on Windows).

What’s next?

The next step will be making some videos with the new setup. There are also some minor software bugs to fix and some missing stuff to add – like endstops for scanners. In the future, I’m planning to add some new instruments, like dot matrix printer and maybe some automated lighting. We’ll see.

More music covers coming soon!
  99 komentarzy to “The Floppotron 3.0”

  1. […] se consacre à la construction du Floppotron un tout long article de blog, où il explique comment il a dû créer son propre firmware pour les contrôleurs et comment il a […]

  2. […] is dedicated to the construction of the Floppotron a whole long blog post, where he mentions how he had to create his own firmware for the controllers and how he coped with […]

  3. Simply marvelous. Great job. I expect you play a track from Joaquin Sabina or Joan Manuel Serrat any time, or a tango.

  4. […] exploring them from below. Sometimes we can do amazing things, like making a music machine like The Floppotron or filling Linn Botanic Garden with rare exotic species. Some of us save […]

  5. […] The Floppotron 3.0 » Silent’s Homepage silent.org.pl […]

  6. […] is The Final Countdown from the Rocky movies.Learn more about The Floppotron 3.0 on the website here.Watch the music video below. Adafruit publishes a wide range of writing and video content, […]

  7. What make and model are the scanners?
    You inspired me to build an 8 drive system. i bring it to our STEM shows.
    Since our shows can be outside or a loud environment, i added guitar transducers on the wood under each rack of drives then through a 16 channel mixer to better bring out each stack.
    keep up the OUTSTANDING work!
    Doyle
    Founder and President, KitsapCREATE.org

  8. is the code open source?

  9. hey , How about play the YMO musics ? same at electronic one

  10. To co wyrabiasz z tymi skanerami i stacjami dyskietek jest świetne i tu pojawia się prośba. Mógłbyś ogarnąć pokaz ale z muzyką z SZEROKIEGO Putina? Byłoby bombowo.

  11. Dude, this is amazing! You should try to add an old dot matrix printer to the mix. Those things can add some extra depth to the flopatron and they are even older than Floppy Disks! I got the idea from Midi Desaster’s YouTube channel. You can check him out here for context:https://www.youtube.com/@MidiDesaster/featured

  12. Dude this brings a tear to my eye every time I watch a video, you legend! What an amazing tribute to the humble floppy and amazing innovation and achievement, cannot wait to hear more and watch it grow further. You have something very unique and valuable here.

  13. I just listened to the Master of Puppets on this today, and it’s cool as usual. But I noticed that you are still not wanting to turn the beta version of 3.0 into a more complete one by doing to the top row of floppy drives as you have done to the hard drives: removing their lids so we can see some camera moves over their mechanics as they play. Even if you think we wouldn’t see much motion, why not show that anyway, just because then at least people who are still not familiar with how these drives look inside will have a good idea of it, and thus it would still be a nice touch?

  14. That is soo cool! 🙂 Thank you for 82L4sharing.

  15. Thank you for entertaining us for all these years!
    I am wondering if you have considered inviting a synth player/midi player to come and play the floppotron live on their channel (and yours). Someone should be able to travel to you. Give it a shot!

    Wish you the best.

  16. […] dengan 512 floppy drive, 16 hard drive dan 4 scanner. Video YoutubeZadrożniak punya didokumentasikan konstruksi mesin (kami sangat terkesan dengan "dinding floppy disk drive"). Tapi kenapa? […]

  17. Big fan!

  18. Can I have pirates of the caribbean on floppotron 3.0

  19. […] su canal de YouTube pueden encontrar muchos más vídeos musicales, mientras que en su Blog da una explicación más detallada, sobre el […]

  20. Hi, I’d would like very much to bring you and The Floppotron 3.0 to Rio de Janeiro for a innovation and techonoly evento called Rio Innovation Week in november. I will send a message in your Facebook.

  21. Can you play „Classical Gas” on the Floppotron 3.0?

  22. Very interesting, I’d like to here some modern music on the Floppotron 3.0. I do kind of miss the Floppotron 2.0, but I am asuming that you are using some of its components.

  23. THAT is impressive!

    I’d like to hear „Star Trek, Strange New Worlds” on the Floppotron 3, please!

  24. Just wanted to say I am a big fan since 2011. I love your work. Hardware and Software design. Your musical abilities. Everything is spot-on. Thank you for your time 😉

  25. Pomyśl podłączyć to do keyboarda (midi)

  26. This is all very impressive. The one aspect that I came here to understand better is the acoustic portion, which is not part of your technical explanation. My question is: what kind of microphone or microphone system do you use to record? Or are you just using the native mic on the video recording equipment you’ve used to make the video? And do you use any Barcus Berry pickups on any of the quieter instruments (e.g., in the way a voilinist or cellist might in a venue that requires amplification)? Very much enjoying this newest iteration of the Floppotron.

  27. Would yo pls creat halo songs?

  28. This is a wonderful creation! I love it.
    I have a suggestion for getting Midi files for songs more easily:
    Spotify recently published an open source tool that allows you to convert mp3 files into a complete midi file. The tool does better than any other tool. It’s called „Basic Pitch”. I hope that helps you.
    Keep up the great work!

  29. […] Reddit by michalg82 – View Source Facebook Twitter Pinterest LinkedIn Like Reddit WhatsApp Post PaginationNext PostNext […]

  30. Do you need some more old hard drives? I think I’ve got about 10 or 20 laying around. Just older stuff. I don’t know if it’s worth the shipping from the Netherlands.

  31. Upgrade request… yes, already!

    OK, with as great as Floppo 3 already is, it got me thinking about V4 already: How cool it would be if you could round up a few 5 1/4″ drives, and even a few 8″ drives, to add to this! Not very many, though; there may be some things out there that are still just on disks from those eras that some people will still need to read and archive to newer media forms, so with the few of those that are left functioning in this world, they should be preserved in working order the best way possible. But it would be fun to see and hear at least a few of them!

    But while you’re at it, don’t stop there! Let’s see you get some of even the OTHER floppy disk form factors: Iomega’s Bernoulli, their Zip, and their PocketZip–one of 3 versions of 2-inch floppy that I know of, along with the Fujifilm LT-1, and Sony VF-50 (video floppy)–and even other physical sizes like 2.8″ used in Brother/Smith-Corona/Ninendo Famicom, etc. There are also the 3 3/4″ floppy and the Amstrad AmDisk! Probably several more than you or/and most people have heard of! OK, well, these really uncommon sizes could be built into Floppotron 5! I don’t know how you’ll want to version things out, but anyway, there are some ideas for future versions.

    Thanks for reading, if so!

  32. Song request:

    CONGRATULATIONS on building your latest and greatest Floppotron; it’s REALLY COOL! These days my FAVORITE secular song is Levitating! By Dua Lipa, you know? I would LOOOOVVVVE to hear and see that (with the top floppy drives delidded and their heads videoed, of course), especially how you’d mimic the Jonathan Kirk/”Dababy” rap from the main remix version! And from there if you’d then want to go back and add the original (the one with the 2 regular verses), that would be awesome too!

    Of course, they both have talking, because the bridge is of Dua talking, so either way it will be extra interesting to hear Floppotron play this!

  33. Hi, I have 2 things:

    1. A while back during Floppo 2’s life, I asked you if you would please delid the top row of floppy drives and include a few shots of their heads in each video from then on. It looks like you don’t often read our YouTube comments and questions, so I brought mine here now.

    2. With YouTube’s song detection algorithm so good now at recognizing even covers of the songs in its database, and with how good you’ve gotten making songs sound with the Floppotron–especially now with V3–have you gotten any copyright claims for it? And if so, then what do you usually do about that?

  34. Yepp – your new setup looks much cleaner and simultaneous more impressive as Floppotron 2.
    Thanks for the joy you gave with this „little” side project you gave us in the last years with it!

  35. Please please please do a song from MASTER BOOT RECORD – PERSONAL COMPUTER, it fits this hardware perfectly!

  36. Amazing job please keep releasing new content!

  37. Very ingenious! Using hdds as noisemakers! Perhaps you can get some printers for one thing!

  38. […] enough, the head speeds up and hits the mechanical stop making the “drum hit” sound. On his blog post Zadrożniak explains that having bought some random old hard drives all of which had different […]

  39. You created something extraordinary, musically enjoyable, visually fascinating, you took time to share the process AND you managed to make it rather comprehensible for an absolutely non-technical and non-nerd like me. Bravo !

  40. Cool project bro, continue it like this

  41. […] comme l’explique son créateur Paweł Zadrożniak sur son blog, le système est devenu de plus en plus complexe. Le mur de lecteurs de disquettes est organisé en […]

  42. Man I’m glad I looked at the blog page for this, it’s amazing. I hope you do Kernkraft 400 at some point on it.

  43. I think your channel is one of the main ones that got me into messing with technology in-depth. Nothing to your scale though, which is just genius and impressive to me!

  44. what an incredible feat of engineering and repurposing old hardware!

  45. This is brilliant! It sounds really musically. Please do a Kraftwerk cover! What would be more appropriate for such an instrument than the music of the pioneers of electronic music? I recommend Computer Love, or Computer World. That would be great!  ≣  : ¬ ℩

 Leave a Reply

You may use these HTML tags and attributes: <a href="" title=""> <abbr title=""> <acronym title=""> <b> <blockquote cite=""> <cite> <code> <del datetime=""> <em> <i> <q cite=""> <s> <strike> <strong>